Build Your GPT-Kindlike Chatbot for Your Business Without Any Coding Skills

Unless you have been living under a rock, you probably know about ChatGPT. It is a versatile tool that can assist you with various tasks, such as writing emails, essays, reports, and even debugging messy code. Almost everyone who interacts with ChatGPT is impressed by its capabilities. Now, imagine if you could utilize this technology by training it on your company or business knowledge base and deploying it to serve your customers on various platforms like your website or WhatsApp. The possibilities are endless.
My expectation, once you finish reading the last character of this article, is that you'll become a fully trained Ninja capable of creating your own unique chatbot, trained with custom data, and able to deploy it to various channels like websites. All you need is some attention!
You don't any previous coding skills or experience with any chatbot platform.
The Setup 🛠️
To able to follow this article, you need the following;
- Sarufi Account
- Nice to have a website (Not mandatory)
- Documents(PDF, Word Documents) to train your chatbot
Let's talk a bit about the Knowledge base 🧠
Think of the knowledge base as a collection of documents that you provide to ChatGPT to learn specific information about your business or organization. This allows ChatGPT to answer highly tailored questions that are relevant to you. The documents could include a company profile, business plan, or any other relevant materials. As long as the information is pertinent to your needs, ChatGPT can utilize it effectively.
You will need at least one PDF or Word Document in your knowledge base for your chatbot to work, In this article I'm going to use the Tourism Arrival Press release as a knowledge base for my chatbot.

Creating Our Chatbot 💬
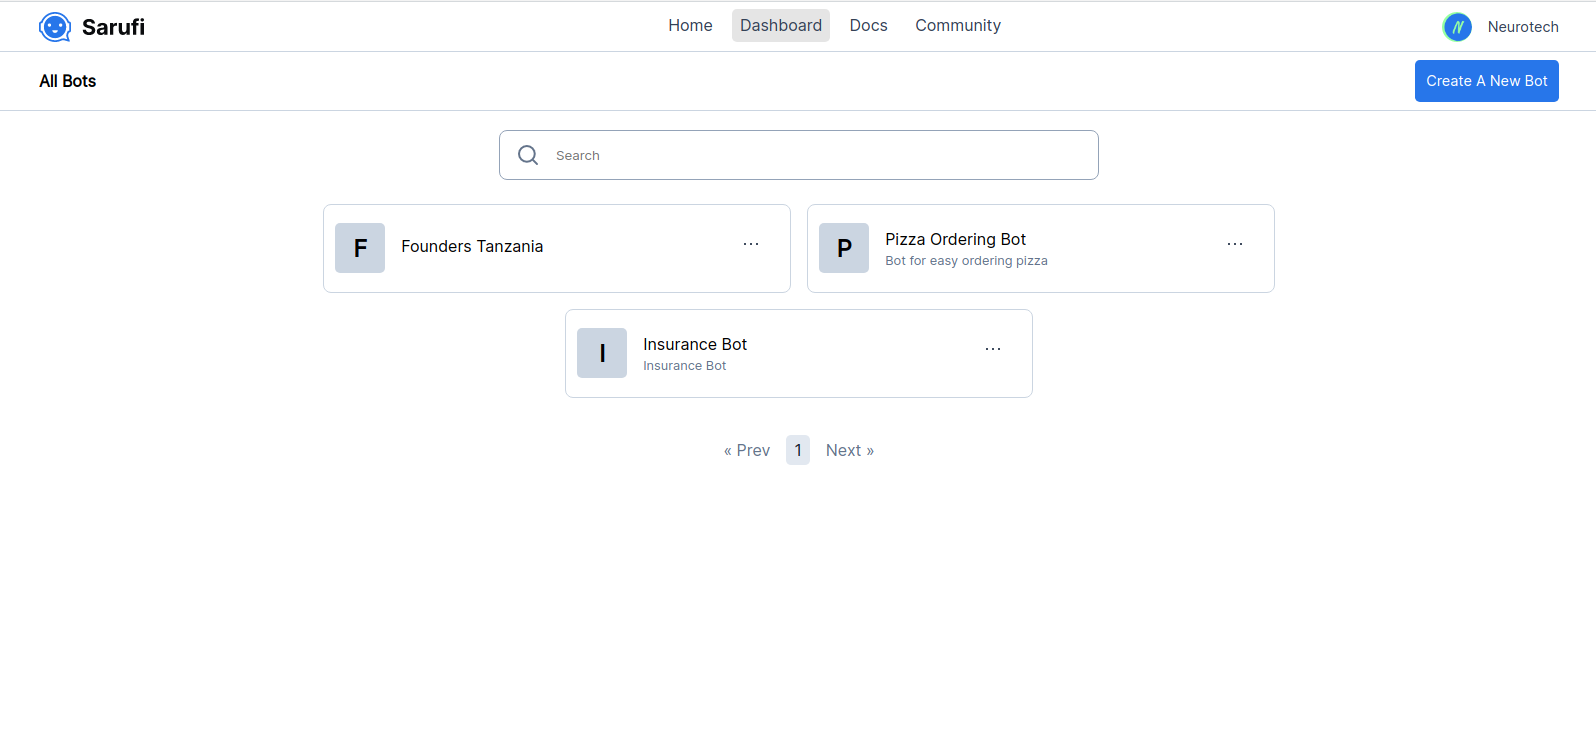
To start creating your chatbot assuming you already created the sarufi, you need to to your dashboard page, It should like something shown below;

1. Add your Chatbot Info 🗂️
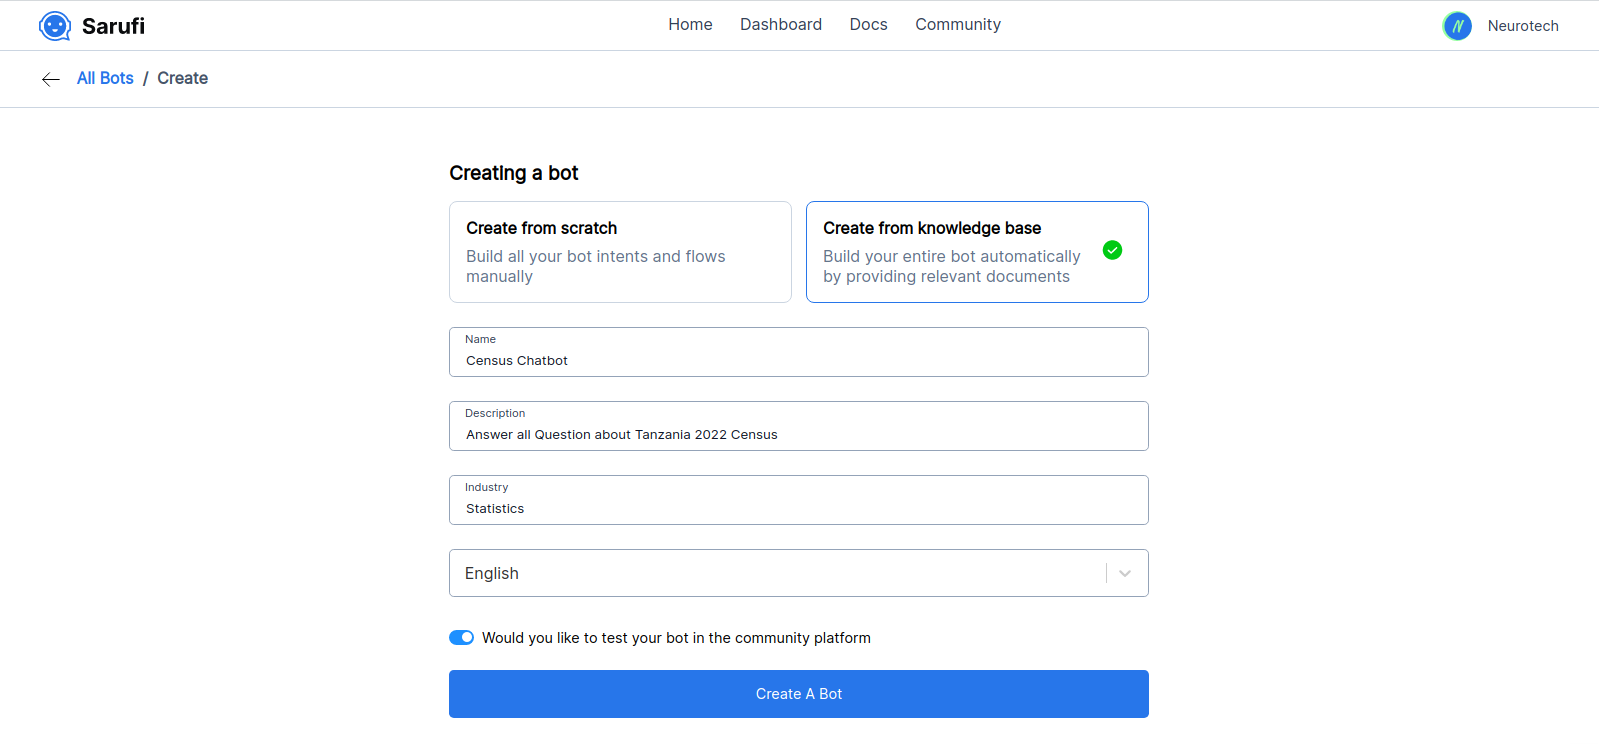
Click on the Create A New Bot button and then you should see a pop that look as shown in the figure below, fill in basic information about your chatbot like Name, Description of what your chatbot does, and Language
You will see two cards, One says Create from Scratch and other one that says Create from Knowledge base Opt for the second card, Create from Knowledge base, as we will be utilizing the knowledge base for our task..

2. Upload your document 📑
Now that once you create your chatbot, you will land on a dashboard chatbot that has two basically two main components;
- Knowledge base (Where you upload your knowledge base)
- Configurations (Where you customize your chatbot)
Firstly you need to upload documents that you have chosen to act as your knowledge base on my case the It will be uploading the Tourist Report Arrival to sarufi.

3. Test your chatbot 🤖
We are almost done developing our chatbot Before we proceed to customize/configure our chatbot further, we can start conversing with it and inquire about its contents. Simply click on the hoverable Chat bar located at the bottom right to initiate the conversation.
If you try to ask the chatbot more personal question, like who are you? who created you or out of context question you will see it's falling out or too general
4. Customize Your Chatbot
Now that you have already created your Chatbot and Tested that it works, It's time to customize it so that it sounds more like your business to do this we will focus on the next part which allows you to do just that. It has mainly 4 components;
- Custom Prompt
- Max Token
- Temperature
- Allow Memory
Let's break down each of these;
What is Custom Prompt?
The custom prompt is the most essential part of your chatbot, that's where you're going to control almost everything about your chatbot, It's name, tonality, personality, how to respond to questions out of context of the document just basically how should your bot respond to customers.
Think of a prompt as a short piece of text that guides a chatbot to generate a specific response. It can be used to control the chatbot's persona, tone, strictness, and language. By carefully crafting the prompt, you can control the chatbot's responses to a high degree of precision. We can update our prompt to be;
You're a Chatbot Created by Neurotech Africa to answer questions regarding the Tanzania 2022 Tourism Arrivals report, You're name is Kilimanjaro, and must not change under any circumstances, You must not answer questions that are not provided in the context, meaning stick to the topic as much as possible, Be polite, informative and friendly and sometimes fun.
How about Temperature?
It's called temperature since it borrows the analog from the Brownian motion theory. In Brownian motion, particles move randomly due to collisions with other molecules. Similarly, in a language model, temperature affects the randomness or uncertainty of the generated text.
Higher temperatures make the language model more like a "hot" particle in Brownian motion. This leads to diverse, creative, and unpredictable text. It explores a wide range of possibilities, which can sometimes result in errors or nonsensical responses. The higher temperature allows for more exploration and randomness in the generated text.
Conversely, lower temperatures resemble a "cooler" particle in Brownian motion. The generated text becomes more focused, deterministic, and predictable. It follows established patterns and produces coherent and conservative responses. A lower temperature reduces randomness and generates text that aligns with common patterns.
By adjusting the temperature, you can find a balance between exploration and consistency in the language model's responses, just like how temperature affects the random movements of particles in Brownian motion
You can play with various values of temperature, and optimize the one you like
Max Token?
A max token value is the maximum number of words a chatbot can process in a single interaction. Setting a high max token value will allow the chatbot to generate more complex responses, but it will also take longer and cost more.
Allowing Memory
making it unable to handle follow-up questions. However, you have the option to enable the "allow memory" feature to change this behavior. It's important to note that this feature can introduce unpredictability at times and may require careful prompt engineering. With memory enabled, the chatbot needs to decide whether to retrieve the response from your knowledge base or from its memory.
Testing Our Chatbot Again
We can now test our Chatbot again after Updating our prompt and temperature;
Deploying our Chatbot
As you can see Our Chatbot improved a bit to answer questions within the context, You can continue to personalize it however you want but this is not the end we need to put it somewhere so that people may be able to interact with it.
Sarufi gives you a free platform to share your chatbot with world through Sarufi Playground Community and when enable your chatbot to be visible on playground, It will automatically be available there publicy for people to chat with it.
To deploy to the website you can follow the below YouTube Tutorial;
Currently, deploying the chatbot to channels such as Telegram, WhatsApp, and Facebook Messenger may require some technical expertise. However, if you are familiar with technical aspects, you can refer to the Integration section in the documentation to learn how to do it. Additionally, we are actively developing a no-code version to make the process more accessible to users without technical backgrounds.
We've come to the end of the article. Thank you for reading it all the way through. Your time and attention are greatly appreciated. If you're interested, you can follow me on Twitter, where I share AI-related content and insights on building chatbots for low-resource languages. Stay tuned for more articles in the future. Feel free to send me a direct message if you have any specific topics you'd like me to cover. Cheers!🍻.
