Data Integration: Adding external database integration to your Sarufi WhatsApp Chatbots
I have always had itchy idea about letting my Sarufi bot fetch some data from database and render it to the user. The idea did fascinate me to trigger a search on possibility. After learning about sarufi webhook, I got the way out for my idea.
In this guide, I will be creating one of the simple operation to fetch from Database. You can make some modifications depending on the structure of responses from your Database endpoint. This is focused on WhatsApp to-be deployed chatbots.
Starting our Journey
In this journey, I assume that you know how to deploy you Sarufi chatbot on WhatsApp. If not, please check out a detailed guide on how to deploy sarufi bot on whatsapp.
I have implemented this idea for my WhatsApp customers. I would like my customers get prices of some commodities from Database. We shall make a minor change in the blueprint to get this working.
It's actually simple, you only need to know what type/format of data is being returned from your source and how you can structure a good response for your users.
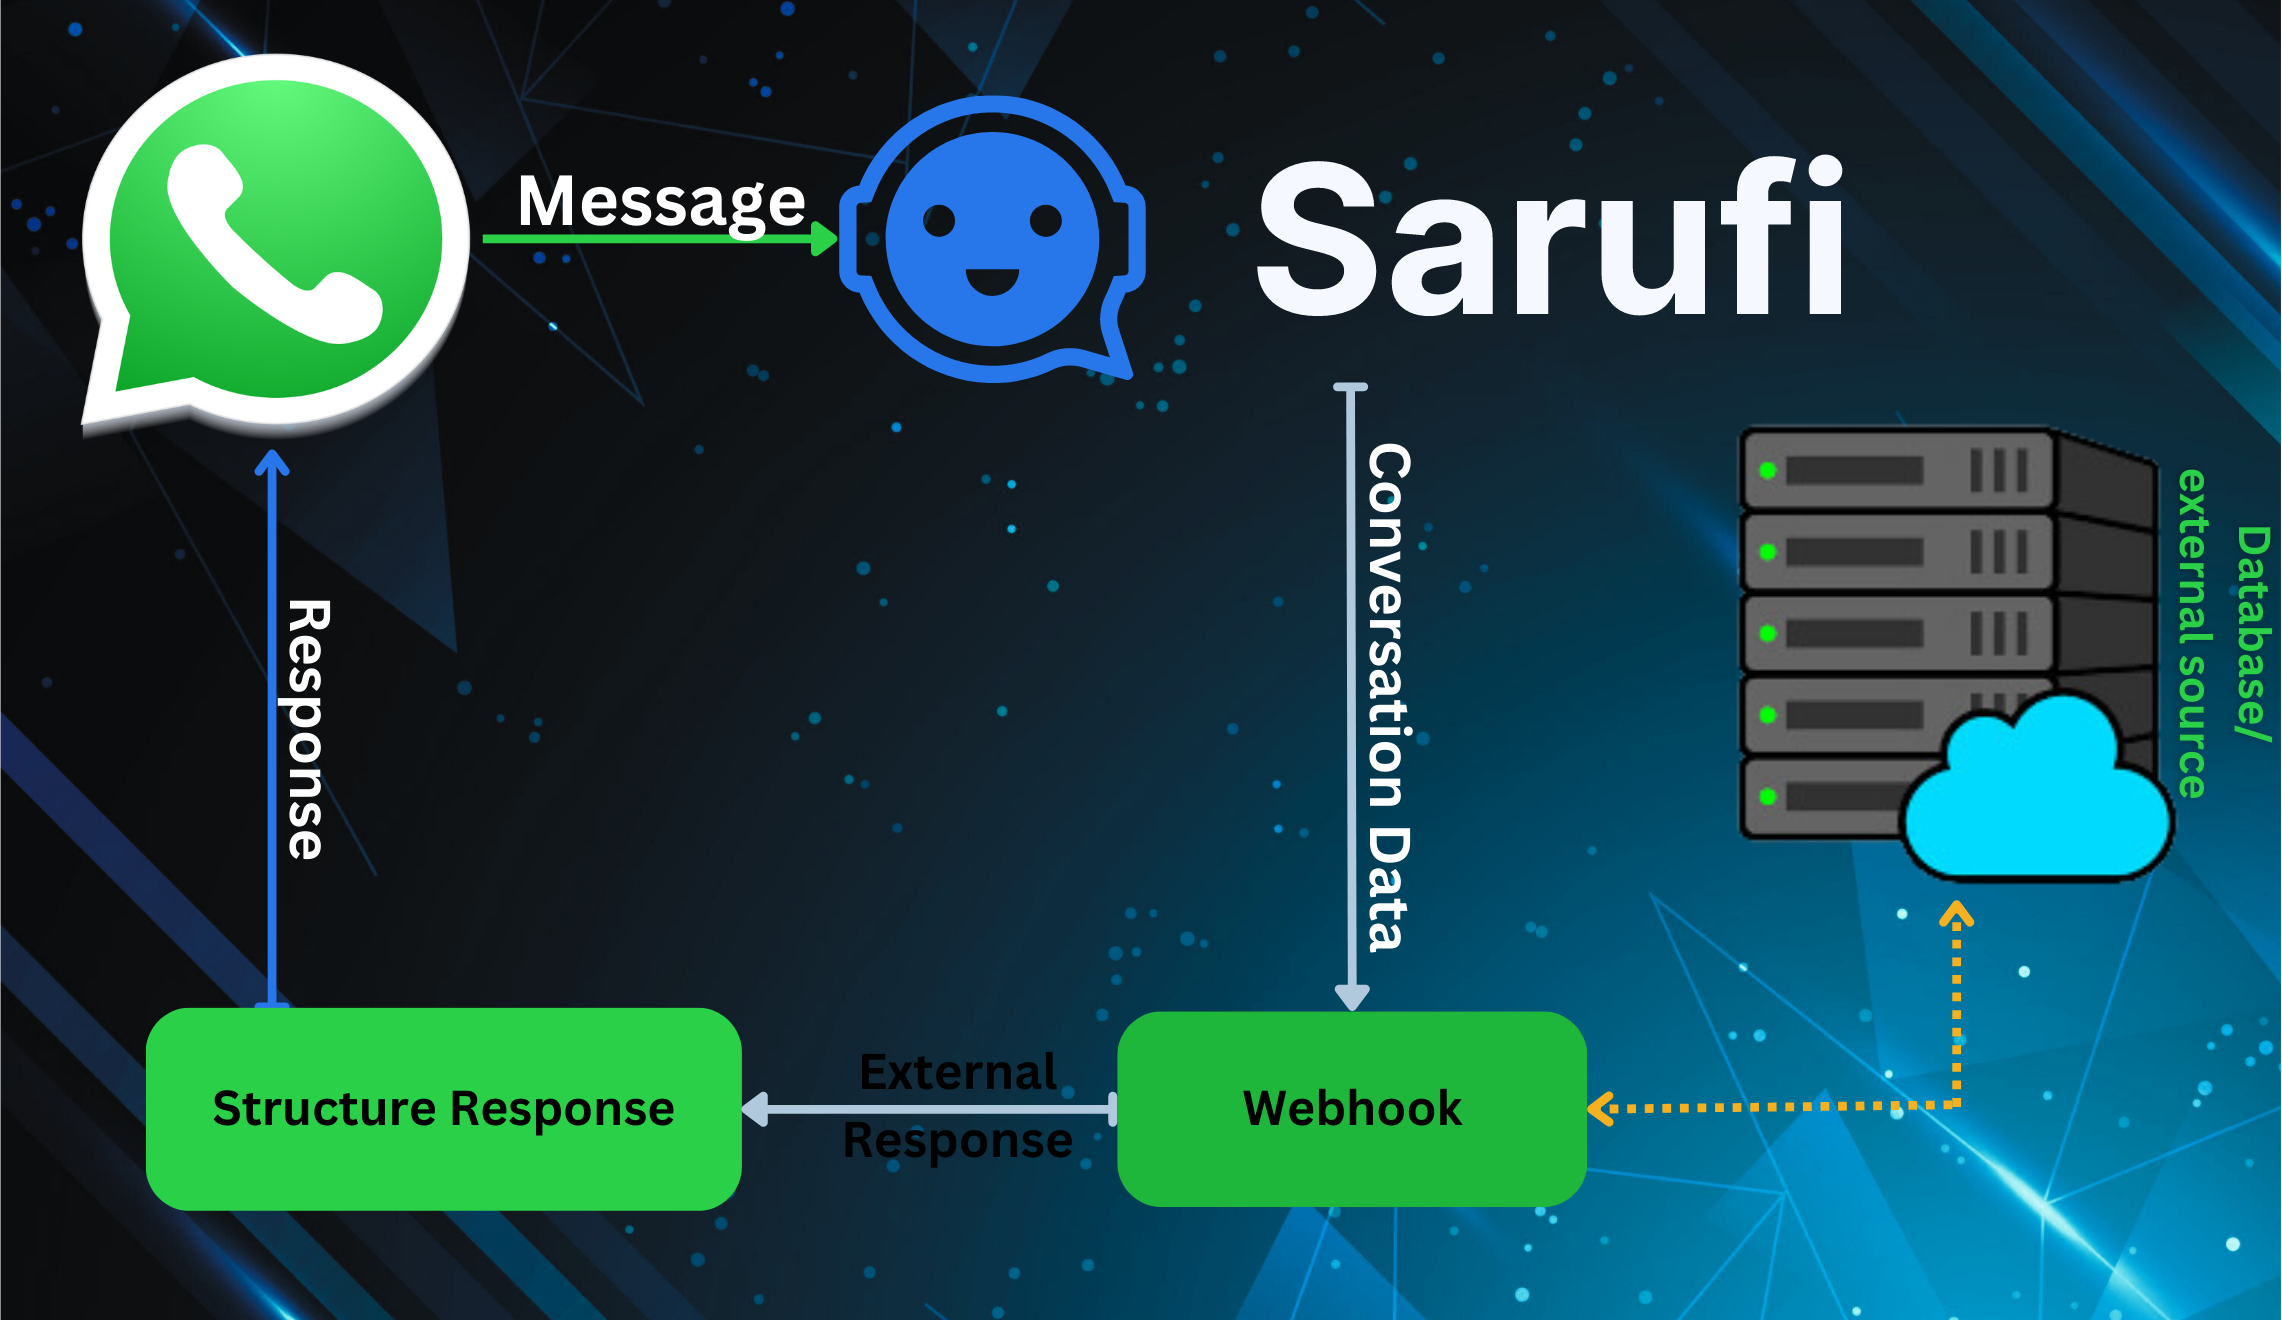
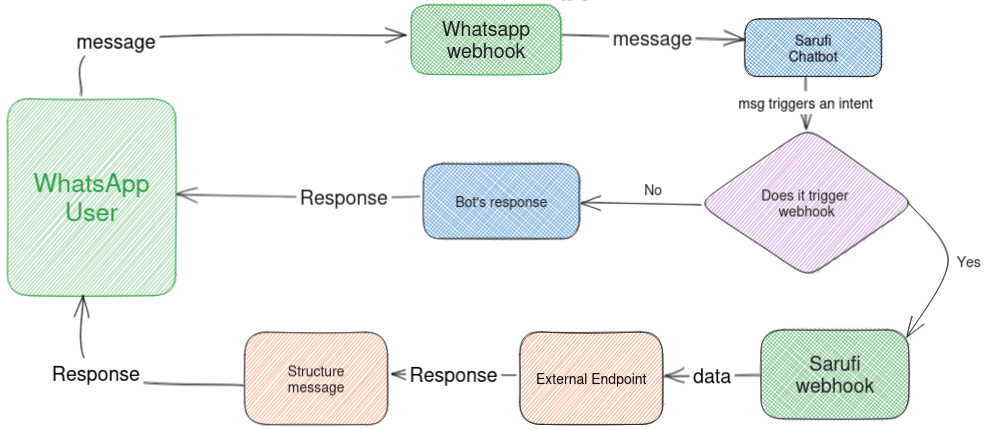
The illustration below shows how the whole idea works.
The part to add
I will be using sarufi heyoo blueprint with only a simple modification. I will add a route to receive data from the sarufi Bot webhook. In the route, I will process the message sent and find the response from my DataBase.
I have created a utils.py file with fuctions to fetch data from Database and structure clear messages. Implementations in utils.py will defer depending on what your source/database return.
├── Project Folder
	├── main.py
	└── utils.py
└── .envThe web-hook endpoint
At the endpoint that receives webhook data from sarufi, you can perform your own custom functions as needed. With this illustration it's just simple work out. Most of the functionalities are implemented in utils.py so i did the import only
from utils import construct_message

"""
Code from blueprint is left out.
This shows only a route that receives data from sarufi
"""

@app.route('/data',methods=['POST'])
def get_data():
  data=request.get_json()

  if data.get("buy_component"):
    mobile=data.get("chat_id")
    name=data.get("buy_component_name")
    message=construct_message(name)

    #send messege response
    messenger.send_message(recipient_id=mobile,message=message)

  #More stuffs can be done here

  return "ok"
I will be using replit sarufi blueprint to add the fuctionality. With replit, you will have a public url(found in webview section). You can also do this with Ngrok. Copy publlic url into sarufi webhook section.
Set web-hook in sarufi
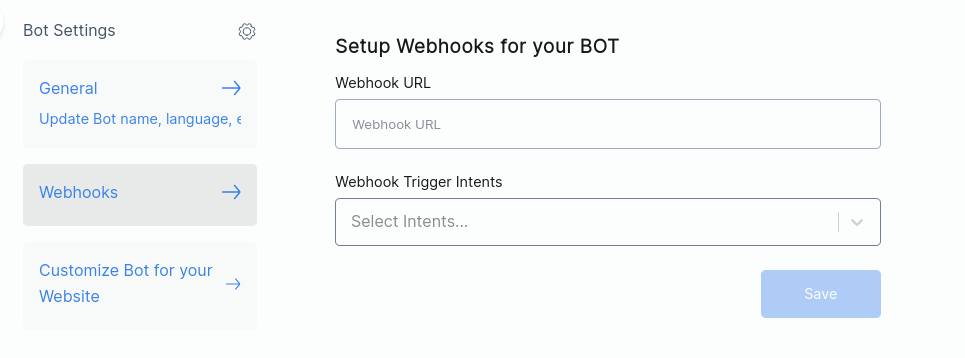
In your sarufi bot, navigate to Settings (Top right)>> Webhooks.
Copy your public url into webhook URL. Then select your webhook trigger intent. After the end of particular intent conservation flow, the conversation data will be sent to your webhook.
Do not forget to save the changes. Now every thing is set, lets put it into action.
Bot at Work
Now your bot is ready, it time to get it working. Here is a sample of the working bot able to respond to user quest.
Here is the end of our short walk. You can catch up with me on Twitter and Email. More content coming soon, keep your eyes open.